
This article includes links to outside resources. We are not responsible for the content on the external site. If there is a link that does not work, please email [email protected] and we will attempt to adjust the information with an updated link.
Use Dynamics 365 App for Outlook to tap the power of your Engage CRM while you’re using Outlook on the desktop, web, or phone. When Dynamics 365 App for Outlook is installed, depending on which version of the app you have installed, you'll see a Dynamics 365 pane or window next to a selected Outlook email message, or when you're composing an email message or setting up a meeting or appointment.
For example, when you open an email message, view information from your Dynamics 365 app about the email recipients. Or with a single click, link an Outlook email message or appointment to a specific CRM record. When you link an email message or appointment to an Engage record, the Outlook record appears as an activity for that record in Engage.
Prerequisites
Your system administrator can make Dynamics 365 App for Outlook available to your organization or you can add it yourself if:
-
You have the Use Dynamics 365 App for Outlook security privilege.
-
Your organization synchronizes mailboxes with server-side synchronization.
Terminology
| Term | Definition |
|---|---|
| Set regarding | Track and link the email or appointment to an existing record in Engage. |
| Tracking | Create a copy of the email or appointment in Engage. |
Use the app for the first time
To display Engage data after you’ve added the app:
-
Select an existing email message in your Inbox, or create a new email message or appointment.
-
On the ribbon, click the Dynamics 365 button.

-Or-
In Outlook on the web, click the Dynamics 365 button in the email pane.

The Dynamics 365 pane appears on the right side of the screen and shows information about the recipients.
Note: If the recipient is a user (internal), as opposed to a contact or lead, it’s indicated above their name:
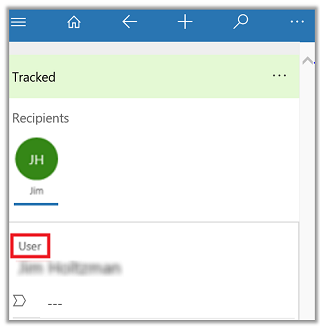
If the recipient isn’t known to Engage, click (+) and then select Add as contact or Add as lead.
A quick tour of the interface
Here's what you see when you first open Dynamics 365 App for Outlook. The Dynamics 365 pane appears under the menu bar and shows information about the recipients.

| Element | Description |
|---|---|
| 1 | The Engage record this email is linked to. |
| 2 | Summary information about the recipient. |
| 3 | Summary information about the recipient's account. |
| 4 | Shows if the email message or meeting is linked to a record and if it's being tracked. |
| 5 | Click to set or change linking and tracking. You can also choose to view your email in Engage. |
| 6 | Click to add an activity. |
| 7 & 8 | Click and then select Set Regarding to link to the record. |

| Element | Description |
|---|---|
| 1 | Your last activity with the recipient. |
| 2 & 3 | Recent records for the recipient. |
| 4 | Click for options related to list of activities. |
| 5 | Click for options related to the activity. The options vary by activity. |
| 6 & 8 | Click for options related to the list of records. |
| 7 & 9 | Click for options related to the record. |
Let's go over the individual elements in the menu bar.
| Element | Description |
|---|---|
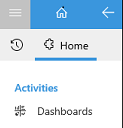 |
Choose Menu > Home > Dashboards to go to the main page. Choose Menu > Recent to see Favorites and recently used records. |
 |
Choose Home to see the initial view. |
 |
Choose Back to return to the last thing you viewed. |
 |
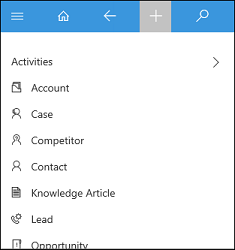
Choose Quick Create to create a new record such as an account or contact. See Create a new record |
 |
Choose Search to search any Engage records. |
 |
Choose Insights to view the most important and relevant information in relation to what you are doing right now. See Gain insights into your activities with relationship assistant |
Add an email recipient as a contact or lead
One of the first things you might want to do when you receive a customer email is add the person as a contact or lead to Engage. In the Dynamics 365 pane, click (+) and then select Add as contact or Add as lead.

Link an email message or meeting to a specific record
You can link an email message or meeting to a specific record, such as an account, contact, or opportunity. This also tracks the email or meeting in Engage.
-
Create or select an email or meeting.
-
Click the Dynamics 365 button in the email pane.
-
Click Set Regarding (---).

-
Enter search text. A list of related records appears.

-
Use the left and right arrows to narrow search and then select a record to automatically track the email or meeting, and link it to the record indicated in the Dynamics 365 pane.
Find a different record to link to
-
Find the record to link in a list or using Search.
-
In Tracked regarding, click (...) > Change Regarding.

-
Click Set Regarding (---).
-
Enter search text. A list of related records appears.
-
Use the left and right arrows to find related cases, invoices, etc., and then select a record to automatically track the email or meeting, and link it to the record indicated in the Dynamics 365 pane.
Create a new record
-
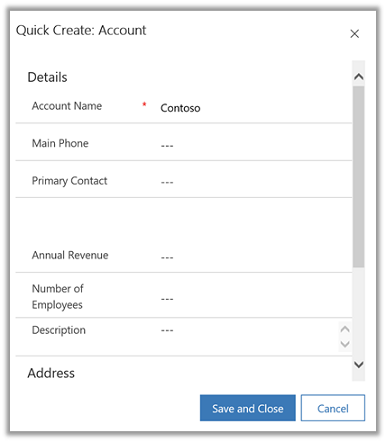
Click Quick Create, and then select the type of record you want to create.
-
Fill in the information in the form.
-
Click Save.
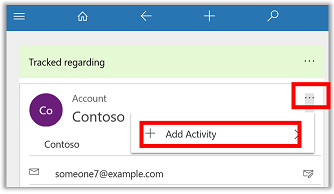
Add a phone call, appointment, or task activity to Dynamics 365 apps
-
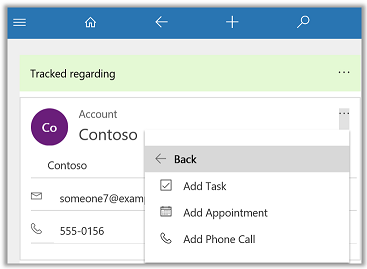
For the record you have linked and are tracking, in Tracked regarding, click (...) > Add Activity.
-
Select an activity.
-
Fill in the information in the form.
-
Click Save.
View the linked email in Dynamics 365 apps
-
Find the linked record in a list or using Search.
-
In Tracked regarding, click (...) > View email in Dynamics 365 apps.

Untrack the regarding record
-
Find the record to link in a list or using Search.
-
In Tracked regarding, click (...) > Untrack.

Engage's Recommendation on Auto Tracking Emails
While there is an option to turn on auto-tracking of emails through the Dynamics 365 App for Outlook, Engage recommends manual tracking of emails you want to track in Engage as shown above.
We do not recommend auto-tracking all emails to Engage for the following considerations:
- Overload of Data: If not properly configured or filtered, auto-tracking emails can lead to an overwhelming amount of data under Activities. This can make it difficult to find relevant information and may clutter your Activities with unnecessary emails. The more emails that are stored in Engage, the more attention must be paid to either cleaning up and deleting older emails or may require the purchase of additional storage space.
- Privacy Concerns: Auto-tracking emails might track sensitive or personal information that should not be stored in Engage, leading to potential privacy breaches or compliance issues.
- Accuracy Issues: Automated systems may not always accurately track emails or may misclassify them, leading to incomplete or inaccurate records. This can impact data integrity and decision-making based on Engage data.
- Duplication: There's a risk of duplicating emails if multiple systems or users are set up to auto-track emails into Engage. Duplicate records can create confusion and waste storage space.
- Dependency on Email System: Auto-tracking relies heavily on the email system functioning correctly. If there are any issues with the email server or connectivity, emails may not be tracked properly.
- Training and User Adoption: Users might become reliant on the auto-tracking feature and neglect manual tracking or verification of tracked emails. This can lead to a lack of understanding of how Engage works and a decrease in overall user adoption.
- Performance Impact: Continuous auto-tracking processes can potentially impact the performance of Engage, especially if it's handling a large volume of emails. This can lead to slower response times and decreased productivity for users.
FAQs
For more information on FAQs, see Frequently Asked Questions about Dynamics 365 App for Outlook.

