
Understanding Views
Within Engage, Views are a list of records for a specific entity (Relationships, Accounts, Portfolios, etc.). You can create customizable views that allow you to sort, group, and view data of all different types.
A View defines:
- Columns displayed
- Column width
- Default records sort
- Default filters for the View
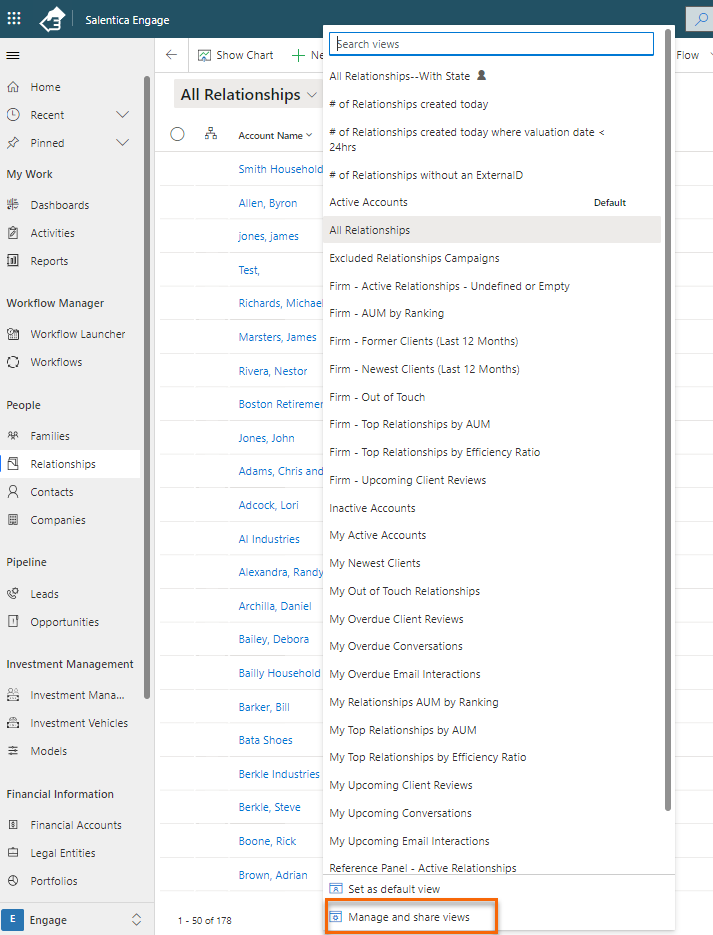
On each entity, there is a drop-down list of views, some are default to the product, others are created and shared by your System Administrators. You can also create your own personal views.
Views also define the data source for charts that are used in the application.
Watch a quick video to learn more about System and Personal Views.
Selecting a View

Personal Views
Personal views are created and owned by individuals. They are visible only to the owner until they choose to share their personal views with other users. These views are typically included at the top in the dropdown of lists before the System Views and are indicated with a person icon. ![]()
You can create personal views by saving a query that you define by using the Modern Advanced Find or by using the Save as new view and Save changes to current view options in the list of views. While you can create a new personal view based on a system or public view, you cannot create a system or public view based on a personal view.
To learn how to create a Personal View, here's a quick video that shows the process.
System Views
System views are views created by an administrator or available as a default part of the Engage product. They are typically shared to all users for an entity such as Relationships or Contacts.
Examples of Relationship System Views:
Firm - Active Relationships
Firm - AUM by Ranking
Firm - Newest Clients (Last 12 Months)
Firm - Top Relationships by AUM
Firm - Top Relationships by Efficiency Ratio
Firm - Upcoming Client Reviews
My Active Relationships
My Connections
My Newest Clients
My Overdue Client Reviews
My Relationships
My Top Relationships by AUM
My Upcoming Client Reviews
As a System Administrator, you can create the System Views, and here's a video to show you how.
Sharing a Personal View
Sharing a Personal View can be completed through the Manage and share views option at the bottom of the views dropdown list. To Share a Personal View:
1. Select the view you want to share.
2. Click the dropdown arrow next to the view name.

3. Select Manage and share views at the bottom of the dropdown list.
4. Select the View Commands option (...) next to the personal view you would like to share and then select the Share item on the menu ![]()
5. Click in the search box for Add user/team and then select the individuals or team members to share the view. Check the circle to select the users/teams.
6. Assign the appropriate rights to the users. Options are Read, Write, Delete, Append, Append to, Assign and Share. Typically read rights are all that are needed.

7. Click Share

Now that the view has been shared, it will show up on the user's view on the appropriate entity for the view with the person icon.


